Chicken Breakfast Fritters
Chicken Breakfast Fritters: Savory Morning Patties
Why Make Breakfast Fritters with Ground Chicken
Quick, Hand-Held Protein
Mornings don’t wait, and neither should breakfast. That’s exactly why I started making chicken breakfast fritters. They’re compact, easy to eat without utensils, and loaded with protein to get the day started right. When made with ground chicken, these patties come together in minutes, and I can cook up a week’s worth in under 30 minutes.
They hold their shape well, reheat beautifully, and pair with anything—whether it’s toast, salad, or even rice. Unlike heavier options like sausage or bacon, chicken keeps things lean without sacrificing satisfaction. The mild flavor gives me a blank canvas to build on, so I can go savory, spicy, herbed, or cheesy depending on the mood.
They also bridge the gap between breakfast and lunch. I’ve served them warm in the morning, packed them cold into wraps for noon, or even layered them into a biscuit sandwich for guests. If you’ve ever made Slow Cooker Chicken Breast and Potatoes, you know the value of a recipe that’s easy but flexible. Fritters fall into that same category—simple, adaptable, and undeniably practical.
Balanced with Veggies and Grains
One of the reasons I keep these in rotation is balance. Fritters aren’t just meat—they’re a mix of chicken, onion, flour, and egg. This means you get your protein, fiber, and carbs in every bite. I often grate in zucchini or carrots when I want more vegetables. Or I’ll stir in cooked quinoa or oats for fiber and texture.
That kind of balance keeps me full longer, without weighing me down. It also makes the recipe a good choice for feeding kids or anyone who’s new to savory breakfasts. The texture is soft enough for small eaters, and the patties are mild until you decide to amp them up.
When I need something more indulgent, I reach for options like Slow Cooker Barbecue Chicken Drumsticks—but on weekdays, fritters win for practicality and portion control. And they can go sweet or savory depending on your spices and sauces.
Essential Ingredients Breakdown
Ground Chicken vs Finely Diced
I’ve tested both approaches—true ground chicken and hand-chopped breast or thigh. Each brings something different to the fritter.
Pros and Cons of Texture
Ground chicken binds better. It’s uniform and soft, which means your patties form quickly and stay together in the pan. The texture is smooth, almost creamy once cooked, especially when combined with egg and flour. This is my go-to when I want a classic, fuss-free fritter with golden crust and a tender center.
Finely diced chicken brings more bite. The chunks sear slightly in the pan and give a meatier chew. However, they don’t bind as easily. I often need more flour or egg to hold them, and I shape them tightly before cooking. This version is more rustic—like a cross between a nugget and a hash—but absolutely worth it if I’m aiming for something heartier.
Ground chicken wins for speed. Diced chicken wins for structure.
Eggs and Flour for Binding
These two ingredients do all the heavy lifting in the batter. Eggs give moisture and protein-based structure, while flour acts as the glue. I mix just until the batter holds its shape when scooped. Over-mixing makes the texture tough; under-mixing makes it fall apart in the pan.
Best Egg-to-Flour Ratios
My golden ratio for every 500g (about 1 lb) of ground chicken is:
- 1 large egg
- 2–3 tablespoons of flour
I adjust flour depending on add-ins like grated vegetables, which release moisture. If the batter feels too loose, I let it sit for 5–10 minutes to absorb. If it’s still wet, I add another spoon of flour. The goal is scoopable, not pourable.
If you’ve ever made Slow Cooker Chicken Breast, you’ll appreciate how timing and proportion control the final texture. Fritters are no different—small adjustments make all the difference.
Onion Varieties and Flavor Impact
The onion adds depth and moisture. I prefer yellow or sweet onions for their mellow profile, but red onions give color and more bite. Green onions work when I want something milder and herbaceous.
I always grate the onion directly into the mixture. This releases juice, which hydrates the flour and flavors the batter without leaving raw chunks. If you want stronger flavor, sauté the onion briefly before adding—it brings out sweetness and removes that raw sharpness.
Too much onion and the fritters break apart. Too little, and they taste flat. I use one medium onion per pound of chicken, finely grated and squeezed lightly to control liquid.
Optional Add-Ins: Herbs, Cheese, Spices
This is where the fritters become yours. I love chopped parsley or dill for freshness. Shredded cheddar or crumbled feta adds richness and crust color. For heat, I stir in chili flakes, paprika, or a pinch of cumin.
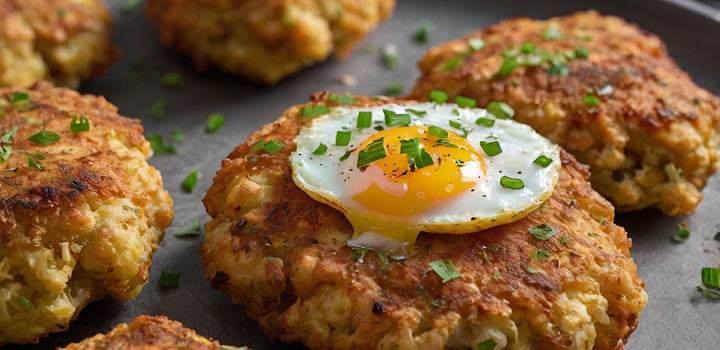
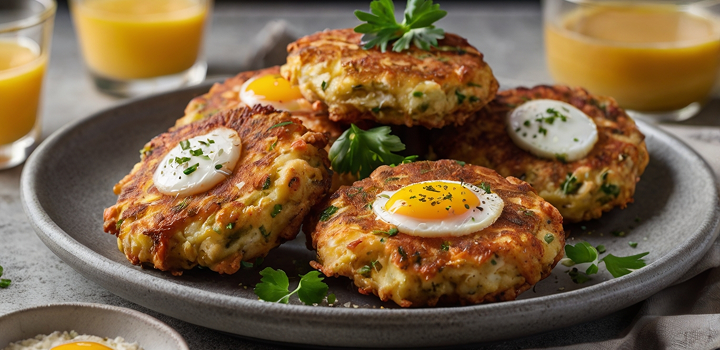
I once folded in a spoon of Dijon and sharp cheddar, then served with a fried egg—an elevated brunch that tasted like more than the sum of its parts. Other times, I keep it simple, pan-fry them small, and serve with yogurt dip for dipping.
You can build out complexity or keep it humble. The core batter stays the same. That’s the beauty of it.
Cooking Techniques for Perfect Fritters

Forming Uniform Patties
Shaping the fritters correctly makes all the difference between a clean flip and a crumbling mess. I use a slightly oiled spoon or damp hands to scoop the mixture and compress it lightly into a round patty about half an inch thick. Too thin and they dry out. Too thick and the center won’t cook through evenly.
The key is consistency. Each patty needs to be roughly the same size so they cook at the same rate. I often chill the mixture for 10–15 minutes before shaping—this firms it up and makes handling easier. If I’m short on time, I spoon the mixture directly into a hot pan and press it gently with a spatula into shape. Either way, don’t overwork the batter—just enough to bind.
Pan-Frying vs Baking vs Air Frying
My go-to is pan-frying. It delivers the best texture: a crisp crust with a juicy center. I heat a neutral oil (like canola or avocado) over medium heat and cook each fritter 3–4 minutes per side. The surface should turn golden and firm before flipping—rushing this step causes breakage.
When cooking for a crowd or batch-prepping, I sometimes bake them. I preheat the oven to 400°F (200°C), brush both sides of each patty with oil, and bake for 15–18 minutes, flipping halfway. The edges won’t be quite as crisp as with frying, but they come out evenly cooked and lighter overall.
Air frying works too, especially when I want a lower-fat version. I set the temperature to 375°F (190°C), spray the basket and fritters lightly with oil, and cook for 10–12 minutes, flipping once. This method browns them well, though the texture is slightly drier.
If I want something extra juicy—especially with chicken breast—I stick with the pan. It keeps moisture where it belongs: inside.
Achieving Crispy Crusts Without Drying
Getting that perfect crust takes control of moisture, heat, and fat. I make sure the batter isn’t too wet, preheat the pan thoroughly, and never overcrowd it. Overcrowding drops the heat and causes steaming instead of searing.
I use just enough oil to coat the pan and let the patties sit undisturbed for the first couple of minutes. This sets the crust. Once they release easily from the surface, I flip.
For an extra boost, I sometimes dust the patties in a fine layer of flour or breadcrumbs right before cooking. It gives an extra crunch while sealing in the moisture. Just be sure not to press them down once flipped—keep the steam locked inside.
Moist, crisp, and golden. That’s the goal. And it’s achievable every time with attention to pan temperature and patience.
Meal Prep & Serving Suggestions
Make-Ahead and Freeze Strategies
These fritters are tailor-made for meal prep. I often double the batch and freeze half for later. Once cooked, I let them cool completely on a wire rack, then place them in a single layer on a tray to freeze. After about an hour, I transfer them to airtight containers with parchment between layers.
They keep for up to 2 months and reheat beautifully. To reheat, I use a skillet with a lid over low heat or pop them into the oven at 350°F for 10–12 minutes. The crust returns, and the interior stays moist. Microwaving is faster but can soften the edges.
Sometimes, I prep the raw batter and shape the patties in advance, storing them in the fridge for 24 hours. This works well when planning brunch or serving guests. The mix stays fresh, and the spices meld better over time.
This kind of prep is why I treat them like I do Slow Cooker Chicken Breast—not flashy, but practical and always ready.
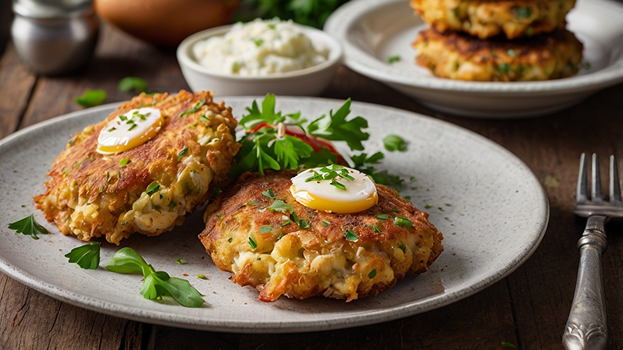
Pairing with Dipping Sauces or Sides
The fritters are versatile enough to stand alone, but dipping sauces bring them to life. I usually serve them with Greek yogurt mixed with lemon, garlic, and dill. It cuts the richness and adds tang. When I want something bolder, I whip up a sriracha mayo or grainy mustard cream.
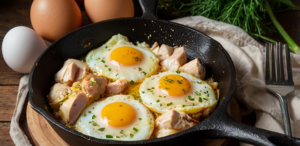
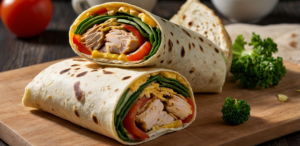
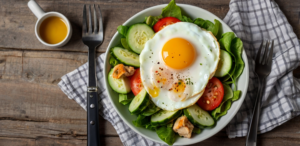
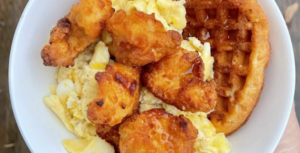
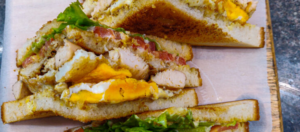
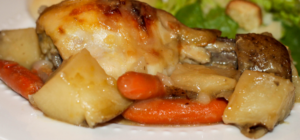
As for sides, I rotate depending on when I serve them. In the morning, I’ll plate them with avocado, sliced tomatoes, or a poached egg. For lunch, I wrap them in flatbread with greens and pickles. For dinner, I pair them with roasted vegetables or a fresh salad.
They also work inside sliders or on a brunch board next to cheeses and olives. They’re blank-slate enough to go sweet too—I’ve served them with a fig compote and arugula and they vanished faster than I could plate the second batch.
Like Slow Cooker Barbecue Chicken Drumsticks, they balance comfort and creativity—you can serve them any way, and they always deliver.
Health and Dietary Variations
Low-Carb & Gluten-Free Twists
When I’m cooking for low-carb eaters—or just trying to lighten things up for myself—I swap out the wheat flour for almond flour or ground flaxseed. Both work well as binders, though almond flour gives a slightly richer, nuttier flavor. Flax adds a subtle chew and moisture, making the fritters feel hearty without grain.
If I want to completely remove flour, I double the egg and mix in a spoonful of grated cheese or psyllium husk. That keeps everything together without crumbling, especially when I’m pan-frying.
For gluten-free versions, rice flour and oat flour both work well. Rice flour gives the best crispy crust, especially if you chill the batter first. Oat flour softens the center slightly but makes the patties feel more breakfast-like—think soft pancakes meets savory cutlet.
If you’ve made Slow Cooker Chicken Breast and Potatoes and adjusted the starch or broth to suit your macros, this is the same mindset. You adapt, and the fritters follow.
Vegetarian Ingredient Swaps
When someone in the house isn’t eating meat, I don’t make a separate meal—I just adjust the base. I replace the chicken with mashed white beans, lentils, or a firm tofu crumble. Each brings a different protein profile, and they all bind well with egg and flour.
The key with vegetarian versions is seasoning. Without the umami of chicken, I lean heavily on garlic, onion, smoked paprika, or even nutritional yeast. A little soy sauce or tamari helps too.
If I want to push it further, I add shredded zucchini, grated carrot, or leftover roasted mushrooms. These aren’t just filler—they build real body and flavor, especially when browned in a hot pan. I often use these for brunch when the main protein might already be covered elsewhere, like in Slow Cooker Barbecue Chicken Drumsticks as a main dish.
Flavor Pairing Chart
Here’s how I pair ingredients when I want to shift the flavor profile. Whether you want Mediterranean brightness, smoky heat, or kid-friendly mildness, the matrix below makes it easy to mix and match.
Herb & Spice Combinations
| Desired Flavor Profile | Fresh Herbs | Dried Spices | Bonus Notes |
| Mediterranean | Parsley, Dill | Garlic powder, Sumac | Serve with yogurt or tzatziki |
| Smoky & Bold | Cilantro | Smoked paprika, Cumin | Great with chipotle mayo |
| Mild & Comforting | Chives, Parsley | Black pepper, Nutmeg | Pairs well with cheese or egg dishes |
| Spicy & Warm | Scallion tops | Chili flakes, Coriander | Add jalapeño to batter |
| Garden-Fresh | Basil, Oregano | Dried thyme, Sage | Finish with olive oil and lemon |
Cheese and Add-In Pairings
| Cheese Type | Texture Result | Best Add-Ins for Pairing | Notes |
| Cheddar (Sharp) | Melty with crust | Chopped chives, mustard seed | Adds a classic, savory backbone |
| Feta (Crumbled) | Tangy, crumbly | Dill, lemon zest, red onion | Great for brunch or mezze boards |
| Mozzarella (Low-Moisture) | Stretchy and soft | Tomato paste, oregano, black olive | Almost pizza-like when pan-fried |
| Parmesan (Grated) | Nutty and crisp | Garlic powder, parsley, breadcrumbs | Intensifies crust and saltiness |
| Cream Cheese (Mixed in) | Smooth and rich | Spinach, paprika, green onion | Creates pancake-like texture inside |
When I’m experimenting, I build fritters the same way I’d plan a cheese board or salad: one base, one fat, one herb, one accent. The chart above is how I’ve kept the dish interesting for years without repeating the same flavor two mornings in a row.
Troubleshooting Fritters
Preventing Fritters from Falling Apart
When fritters fall apart in the pan, it’s almost always an issue with the binding ratio or cooking temperature. The most common mistake I see beginners make is underestimating how wet their mixture is—especially if you’ve added raw onion, zucchini, or other moist ingredients without adjusting the flour. If your batter feels loose, it likely needs one more spoonful of flour or a little time in the fridge to firm up.
Eggs are your second line of defense. One large egg per 500 grams of meat is usually enough, but if you’re using lean chicken breast or adding grains, you may need more structure. You’ll know the mixture is ready when you can scoop it and it holds shape without sagging.
Pan temperature matters too. If the oil isn’t hot enough when the fritter hits the pan, the bottom won’t set and will stick, crumble, or soak up excess fat. I always test with a tiny bit of batter first—if it sizzles immediately, you’re ready.
If you’ve ever dealt with over-shredded textures in recipes like Slow Cooker Chicken Breast, you’ll recognize the importance of ingredient balance here too.
Fixing Greasy or Soggy Patties
A soggy fritter is often the result of three things: low pan heat, excess oil, or overcrowding. Start by using just enough oil to lightly coat the surface. I use a nonstick or cast iron skillet and wipe out excess oil between batches if needed.
Let the patties brown undisturbed for 3–4 minutes before flipping. This builds a crust that locks in the moisture and prevents the fritters from absorbing oil. If they’re soaking up too much fat, the pan may not be hot enough.
I also avoid stacking fritters after cooking. That traps steam and softens the crust. Instead, I place them on a wire rack or a paper towel-lined tray with space between each one.
If you’re baking or air-frying and getting a spongy texture, try brushing the surface with oil before cooking and letting the batter rest 10 minutes so the flour hydrates properly. Like with Slow Cooker Chicken Breast and Potatoes, a little pause in prep makes a big difference in final texture.
15+ Frequently Asked Questions
1. How do I know when the fritters are fully cooked inside?
I look for a firm texture with no visible pink in the center. The best indicator is the bounce: press the center gently, and if it springs back, it’s cooked through. I often use a digital thermometer—160°F (71°C) is the safe zone for ground chicken.
2. Can I make the batter the night before?
Yes, and I often do. The flavors deepen overnight. Just cover and refrigerate. Before cooking, let it sit at room temp for 10–15 minutes. You may need to add a small spoon of flour if the mix has loosened.
3. How long do cooked fritters last in the fridge?
They keep for up to 4 days in an airtight container. I reheat them in a skillet over low heat with a lid to restore moisture and crispness.
4. Can I freeze them raw?
Technically yes, but I recommend cooking first. Raw batter with onion or egg can release water as it thaws. Fully cooked fritters freeze better and reheat more evenly.
5. What oil is best for pan-frying fritters?
I use avocado oil or a light olive oil. Both have high smoke points and clean flavors. Avoid butter or sesame oil—they burn too quickly at the temps needed for a crisp crust.
6. Why are my fritters tough or rubbery?
Overmixing or too much flour is usually the cause. Handle the batter gently, just enough to combine. If it’s too firm, stir in a spoonful of yogurt or milk to loosen it before shaping.
7. Can I bake fritters without flipping them?
You can, but they’ll be pale on one side. For an even crust, flip halfway through baking or use the broiler for a minute or two at the end.
8. Are these kid-friendly?
Absolutely. The mild flavor makes them a hit. I often shape them smaller for little hands and skip any spicy ingredients. Add a side of yogurt or fruit for balance.
9. What’s the best dipping sauce for these fritters?
I love lemon-garlic yogurt dip or mustard cream. For spice, try a mix of Greek yogurt and sriracha. Even a spoonful of BBQ sauce works beautifully.
10. Can I cook these in the oven and still get them crispy?
Yes, if you brush them with oil and bake on parchment or a wire rack at 400°F (200°C). The wire rack helps air circulate for a crisp finish.
11. Can I add shredded vegetables like carrots or zucchini?
Definitely, but squeeze out excess moisture before adding. Too much water in the batter will cause breakage. Adjust flour slightly if needed.
12. Do I need a food processor for this recipe?
Not at all. I mix by hand in one bowl. If you’re using whole chicken pieces instead of ground, a knife is all you need.
13. Can I serve these cold?
Yes, they’re great chilled in wraps or sandwiches. I often pack them with hummus and greens for lunch. Just slice thin for easier layering.
14. What side dishes go well with chicken fritters?
For breakfast, I serve them with eggs, avocado, or toast. For lunch, a crisp salad or roasted vegetables works perfectly. They’re also excellent alongside Slow Cooker Chicken Breast if you’re building a buffet.
15. How do I keep the fritters from sticking to the pan?
Use a nonstick or well-seasoned skillet and heat it properly. The batter should sizzle on contact. Avoid moving them too early—once the crust forms, they release naturally.


Post Comment