Country Style Chicken and Eggs
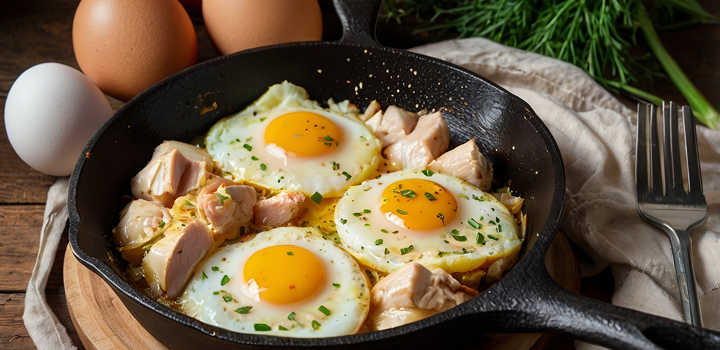
Country Style Chicken and Eggs: Hearty Skillet Breakfast
- Why Make a Country Style Chicken and Eggs Skillet
- Timing and Layering: When to Add Each Ingredient
- Essential Ingredients Breakdown
- Cooking Techniques for the Perfect Skillet
- Cooking This Dish Outdoors (Campfire or Grill Skillet)
- Variations & Dietary Adjustments
- Serving Suggestions and Sides
- 15+ Frequently Asked Questions
Why Make a Country Style Chicken and Eggs Skillet
Comforting One Pan Meal
I’ve been cooking rustic breakfasts for years—on the stovetop, in cast iron, and even over an open flame—and if there’s one method that never fails, it’s the covered skillet. There’s something honest and deeply satisfying about putting chicken, onions, and eggs together in a single pan and letting them transform into a meal.
This dish came out of practicality. I wanted something filling, protein-rich, and comforting that didn’t involve three burners or a pile of dishes. With just a heavy-bottomed pan and a tight-fitting lid, you can build layers of flavor, tender chicken, and eggs with perfectly set yolks. No flipping. No oven. Just steam, heat, and control.
What makes this skillet so effective is its simplicity. The ingredients do the work. The fat from the chicken, the sweetness of caramelized onion, and the richness of the egg combine into something bigger than the sum of its parts. I often cook this when I want to slow down but still eat well, like I do with recipes such as Slow Cooker Chicken and Sweet Potato Curry Without Coconut Milk—low on complexity, high on payoff.
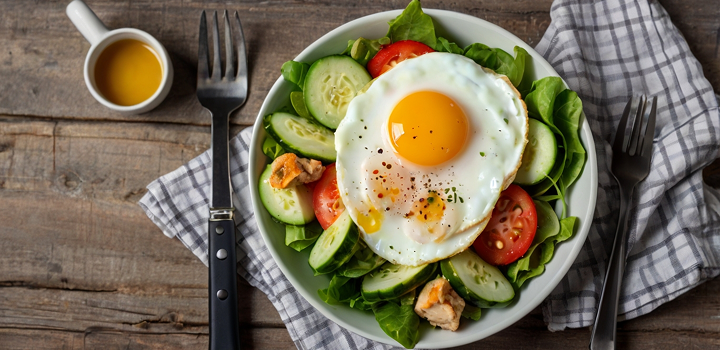
Protein Rich Breakfast to Start the Day
I built this recipe around how I actually want to feel after breakfast—satisfied, not stuffed, and fueled for the next five hours. Chicken brings clean protein, eggs round it out with healthy fat and structure, and the whole dish avoids sugar spikes that come with toast-heavy mornings.
Depending on how you prep the chicken—grilled, shredded, or sliced—you can hit 30 to 35 grams of protein in one plate. That’s ideal not just for fitness goals but also for mental focus and blood sugar control. It’s the kind of breakfast I recommend to anyone who wants to stay sharp without relying on caffeine or snacks by 10 AM.
If I want to change it up, I’ll use skin-on chicken thighs for extra richness, similar to how I prepare Chicken Thighs in Air Fryer. It’s easy to swap in what you have on hand and still come away with a complete breakfast.
Timing and Layering: When to Add Each Ingredient

Why the Order Matters in One-Pan Cooking
The biggest mistake I see beginners make with this kind of skillet meal is trying to cook everything at once. If you toss raw chicken, sliced onions, and eggs into a hot pan and slap on the lid, you’ll end up with rubbery meat, steamed onions, and overcooked eggs. Timing is everything.
Cooking in stages is how you build real depth of flavor. You want the chicken to brown—not just turn white. You want the onions to soften and caramelize before eggs ever hit the pan. Each step prepares the next. That’s the rule I follow, whether I’m building a breakfast skillet or prepping components for dishes like Cook Chicken for a Salad—you can’t rush texture or flavor.
The lid is your final tool, not your starting point. You use it when you’ve already laid the foundation: the meat is browned, the onions are golden, and now the eggs need gentle heat and a bit of steam to set without turning chalky. That’s when the lid goes on.
Staging Chicken, Onions, and Eggs for Best Results
Here’s how I break down the flow in my kitchen.
I heat a well-seasoned cast iron skillet or a nonstick sauté pan over medium heat. Once it’s hot, I add oil and lay in the chicken—cut into bite-sized strips or small fillets. I season it simply with salt, black pepper, and paprika, letting it brown untouched for at least three minutes before flipping. Once both sides are golden, I remove the chicken and keep it warm on a plate.
In the same pan, I drop in the onions. If there’s too much fat, I spoon some off, but I leave just enough to coat the base. I cook the onions until they soften and turn golden brown. If I want to go deeper, I add a splash of water or stock and deglaze the pan, scraping up any browned bits from the chicken—that’s pure flavor.
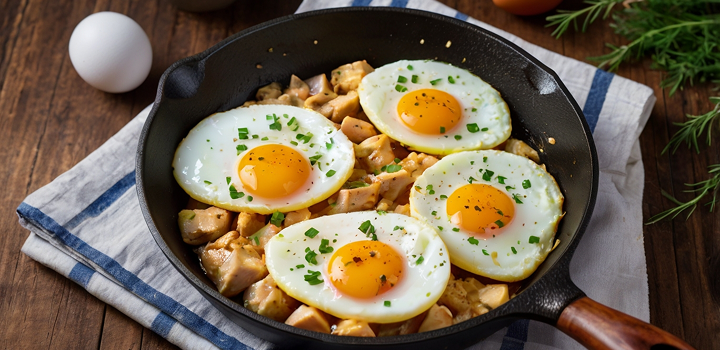
Then, I return the chicken to the pan and nestle it into the onions. I reduce the heat to low, crack the eggs directly into small wells between the meat and vegetables, and season them lightly. I cover the pan with a lid and let the steam do the work. Depending on the size of the eggs and the heat, they’re usually set in 3 to 5 minutes. I never walk away during this step—the difference between silky yolks and dry eggs is less than 60 seconds.
When everything looks just right, I remove the lid, kill the heat, and let the skillet sit uncovered for a minute. This allows carryover heat to finish the eggs gently. Then I plate straight from the pan or bring it to the table as-is. It’s rustic, it’s real, and it always delivers.
Essential Ingredients Breakdown
Chicken Choices: Breast, Thighs, or Leftover Rotisserie
Clean-Flavored Chicken Breast
When I want a lighter flavor and leaner profile, I go with boneless, skinless chicken breast. I slice it thin or cut it into cubes so it cooks quickly and evenly. Chicken breast doesn’t have as much fat or connective tissue as thighs, so it benefits from seasoning and a good sear. I always pat it dry before adding it to the pan to get that golden crust. Once cooked, the meat stays mild and tender, blending perfectly with soft-cooked eggs and sweet onions.
This option is best if you’re looking for a high-protein, low-fat skillet breakfast without heavy seasoning or richness. It’s also ideal if you plan to serve the dish with bolder sides or a strong sauce on the plate.
Juicy Thighs for Richness
If I want something a little more indulgent or if I’m cooking for someone who loves deeper flavor, I reach for boneless chicken thighs. Thighs bring more natural fat and connective tissue, which translates to juicier meat and more flavor. I sear them skin-side down if they’re not trimmed, or cook them in strips like breast meat, but with lower heat and a slightly longer cook time.
The richness from the rendered fat pairs beautifully with soft onions and eggs cooked in the same pan. It’s a technique that reminds me of how I treat darker cuts in dishes like Chicken Thighs in Air Fryer—not just to cook the meat, but to build the flavor base for the rest of the pan.
Shredded Rotisserie for Speed
Sometimes I just want breakfast fast. That’s when I pull out shredded rotisserie chicken from the fridge. It’s already cooked and seasoned, which saves 10 to 15 minutes of prep. I sauté the onions first, then toss in the shredded chicken just long enough to warm it up and crisp the edges.
This shortcut doesn’t sacrifice flavor if you know how to handle it. I avoid overcooking—rotisserie meat can dry out quickly. A spoon of water or broth helps revive the texture. And I always taste before salting since rotisserie chicken usually has plenty of seasoning already.
Onions: Sweet, Savory, or Spicy
Onions are the backbone of this dish. I typically reach for yellow or sweet onions for balance—they soften beautifully and add a mild, earthy sweetness that plays well with both chicken and eggs. For more punch, red onions bring edge and color, while shallots offer something softer and more delicate.
I slice them into half-moons or rings and cook them low and slow to release their sugar. A pinch of salt early on helps them sweat. If I want a kick, I add a few slivers of green onion or a diced chili pepper late in the cooking process. The type of onion you use sets the tone—sweet for mellow warmth, sharp for contrast, spicy for a wake-up call.
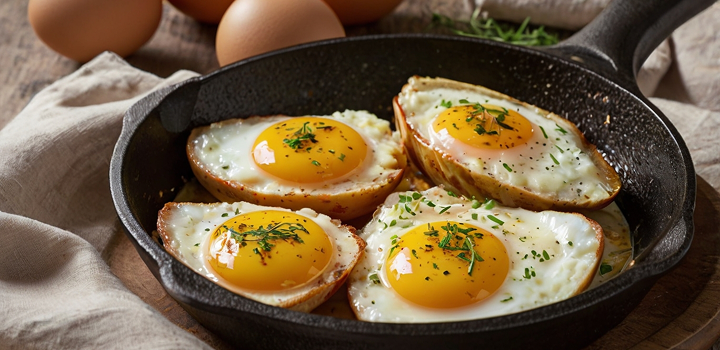
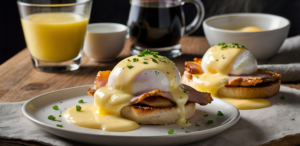
Eggs Cooked Under the Lid for Peak Texture
Sunny-Side vs Over-Easy vs Well-Done
The magic of this dish happens when the eggs go in and the lid goes on. The lid traps steam and cooks the tops gently, so there’s no need to flip. If I want sunny-side eggs with runny yolks and set whites, I use low heat and check at 3 minutes. Over-easy style needs about 4–5 minutes with the lid on and a short flip at the end for 15 seconds, just to firm the top.
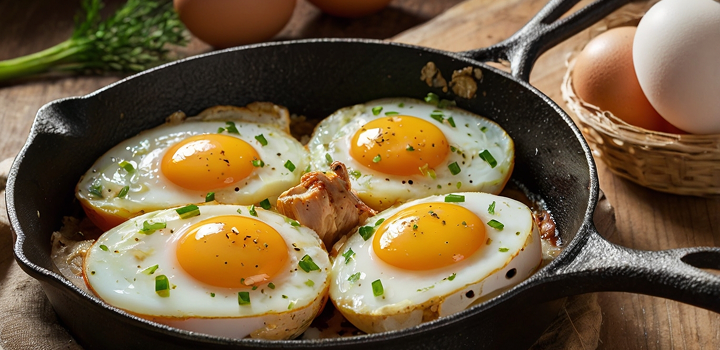
For well-done eggs, I let them go for 6–7 minutes under the lid until the yolks are fully set. This version works best when I know I’ll be reheating leftovers or packing the meal for later.
No matter which version I choose, I crack eggs directly into the pan between the chicken and onions. I make small wells so the whites don’t run across the surface, and I never disturb the pan once the eggs are in—steam, not movement, does the work.
Optional Fillers: Potatoes, Peppers, Mushrooms
When I want to stretch the meal or add complexity, I bulk it out with vegetables. I parboil diced potatoes or use leftover roasted ones, tossing them into the pan just after the onions begin to brown. They soak up flavor and crisp slightly at the edges.
Sliced bell peppers bring color and crunch, while mushrooms add earthiness and body. I always cook mushrooms separately first to drive off their moisture, then add them to the pan just before layering in the chicken and eggs. The result is more than breakfast—it’s a full skillet meal.
Cooking Techniques for the Perfect Skillet
Browning Chicken and Caramelizing Onions
This dish starts with heat and patience. I preheat the skillet over medium-high until a drop of water sizzles on contact. Then I add oil—usually olive oil or butter—and lay in the chicken. I avoid crowding the pan to ensure the meat browns, not steams. Each piece needs at least 3 minutes undisturbed to build that golden crust.
Once the chicken is browned on both sides, I remove it and set it aside. Into the same pan go the onions, which immediately start picking up the fond left behind. I drop the heat to medium-low, stir gently, and let the onions soften and caramelize. This takes about 8–10 minutes if I want deep golden color and sweetness.
The key is not rushing either stage. Chicken browns on dry heat. Onions mellow with time. Together, they create a rich, flavorful foundation.
Building Flavor with Deglazing and Spices
After the onions begin to color, I sometimes deglaze the pan to lift all those browned bits. A splash of chicken broth, white wine, or even water helps dissolve the fond and creates a light glaze. I stir with a wooden spoon, scraping gently.
This is when I add spices. I often use smoked paprika, cumin, or crushed chili flake—nothing overpowering, just enough to underline the savory depth. Garlic goes in last to avoid burning, and I bloom it in the center of the pan for 30 seconds before mixing.
Seasoning at this stage matters. The flavors will carry through the eggs and chicken, so I taste and adjust here, not after the eggs go in.
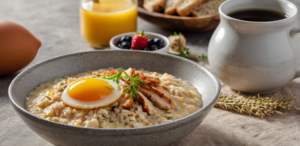
Cover-and-Cook Method for Set Eggs
Once the flavor base is built and the chicken is back in the pan, I create small gaps between ingredients and crack in the eggs. I reduce the heat to low and place a tight-fitting lid on top. Steam begins working almost instantly.
Depending on the doneness I want, I check at 3, 4, or 6 minutes. I tilt the pan slightly to see if the whites are set. If not, I recover and wait another 30 seconds. The goal is control—eggs should be soft but cooked, yolks intact, and nothing rubbery.
I always lift the lid away from me to avoid condensation dripping onto the eggs. When they’re done, I remove the pan from the heat and rest for one minute. This lets everything settle and gives you time to gather herbs, sauces, or a warm plate.
It’s not just a cooking method—it’s a rhythm. And once you get it right, it becomes the kind of breakfast you can build with your eyes closed.
Cooking This Dish Outdoors (Campfire or Grill Skillet)
Country Breakfast Over a Fire
There’s something timeless about cooking breakfast outdoors. Whether it’s over a fire pit at a campsite or on a cast-iron skillet laid across a grill grate, the country-style chicken and eggs dish adapts perfectly to open flame. I’ve made it by the riverbank, in the mountains, and in my own backyard—and every time, it tastes like something bigger than just breakfast.
Cooking this way brings out more smoke, more depth, and just enough unpredictability to make the result feel like an accomplishment. The key is managing the heat and working in stages—just as you would indoors, only with more attention and more instinct. The chicken sizzles fast over flame, the onions pull in the smoke, and the eggs steam gently under a cast-iron lid.
When I want the breakfast to feel fully off-grid, I skip cheese, cream, or any extras. It’s just meat, eggs, and heat. This version always reminds me of slow, rustic dishes like Slow Cooker Chicken and Sweet Potato Curry Without Coconut Milk, where you rely more on time and environment than on equipment.
Tools, Heat Control, and Pan Selection for Outdoors
For outdoor cooking, I use a 10- or 12-inch cast-iron skillet. It holds heat well and can handle uneven flame. I make sure it’s well-seasoned so nothing sticks, especially delicate egg whites. My lid is either a heavy metal one that fits snugly or an improvised cover of foil crimped tight.
If I’m cooking on a grill, I set the skillet over indirect heat at first—so the chicken browns without charring—then move it closer to the flame when I need the onions to caramelize. When it’s time for eggs, I pull the pan slightly away from the heat and cover. Residual warmth and a good lid do the rest.
Fire control is everything. I don’t cook over open flames—I use glowing coals or turn gas burners to low. Wind and cold weather can extend cook times, so I always monitor and adjust. A wooden spoon, tongs, and heatproof gloves complete the kit.
It’s not fast. But it’s deliberate. And the results taste like real work and real reward.
Variations & Dietary Adjustments
Low-Carb and Keto Modifications
When I’m cooking low-carb, I skip any starchy fillers like potatoes or bread. I focus on clean protein and fat: chicken thighs, whole eggs, a little olive oil or butter for richness. Sometimes I’ll add wilted spinach or zucchini ribbons at the onion stage to introduce some bulk without carbs.
If I want more satiety, I add sliced avocado or crumble in a bit of feta near the end—not traditional, but it gives great contrast. The skillet format works perfectly for keto because you’re already cooking everything in fat and steam, not in carbs. And the lid keeps moisture in, preventing the kind of drying you get from oven bakes.
This is also a great way to reuse leftovers. I’ll sometimes add bits of Cook Chicken for a Salad from the night before and build the whole breakfast around that. It’s efficient, flexible, and satisfying without the spike.
Dairy-Free Options (Swap Butter/Cheese)
If I’m cooking for someone who avoids dairy, I make a couple of small swaps. Instead of butter, I use olive oil or rendered chicken fat for cooking the meat and onions. It gives richness without the lactose. I also leave out any finishing cheese—though if I want creaminess, I’ll stir in a spoon of unsweetened oat milk or almond yogurt just before cracking the eggs.
Flavor doesn’t suffer if you manage your heat and salt well. I often add herbs, mustard powder, or smoked paprika to deepen the savory profile. For eggs, I still cook them under the lid—but I oil the pan well and avoid flipping to keep the whites smooth and intact.
These dairy-free versions are lighter but just as filling, and they keep better when packed for later or reheated.
Vegetarian Variant with Plant Protein
When making a vegetarian version, I swap out the chicken for sautéed mushrooms, firm tofu, or plant-based sausage. Mushrooms give the most flavor—I use a mix of cremini and shiitake, browned first in the pan before adding onions. I slice the tofu and brown it until golden on both sides before layering in eggs.
I still follow the same build: cook in stages, crack in eggs last, and cover to steam. Without meat, the seasoning matters more. I use soy sauce, miso paste, or chili oil to bring extra savoriness.
The result isn’t a compromise—it’s a fully formed skillet meal. It’s especially useful if cooking for mixed eaters: one pan, two options, same technique.
Serving Suggestions and Sides
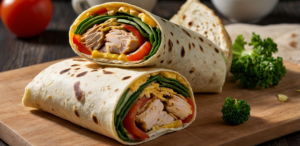
Rustic Country Biscuits vs Toast
What you serve alongside this skillet breakfast depends entirely on the experience you want. If I’m leaning into the full country-style meal, I make drop biscuits—rough-edged, golden brown, and ready to mop up yolks and onion glaze. These biscuits are heavy enough to stand up to the dish but not so rich that they overpower it.
When time’s short, I go with toast. Thick-cut sourdough or seeded rye works best. I grill it in the same pan after removing the eggs, letting it pick up the last bit of chicken fat and onion flavor. The charred edges and chewy crumb give texture and help round out the plate without a full batch of baking.
In summer, I might serve with fresh tomatoes or a spoon of cold yogurt. In winter, it’s always something hot and toasty. Either way, the skillet is the star—the side is just support.
Fresh Herbs and Finishing Touches
Right before serving, I add a handful of chopped herbs. Parsley brings brightness, chives add bite, and dill gives a hint of countryside earthiness. I don’t stir them in—I sprinkle right over the eggs and let the heat release their oils.
Sometimes I’ll add a pinch of chili flakes, a drizzle of olive oil, or even a squeeze of lemon if the meal feels heavy. These final touches aren’t garnish—they’re balance. They keep every bite feeling alive and layered, even if it’s just a three-ingredient base.
When I’m plating for guests, I serve directly from the skillet. It stays warm longer, looks rustic, and invites second helpings.
15+ Frequently Asked Questions
1. Can I use raw or leftover chicken for this dish?
Yes. Raw chicken gives you more flavor control, while leftover cooked chicken (like rotisserie or prepped breast) saves time. Just add it later in the process so it doesn’t dry out.
2. How do I keep the eggs from overcooking under the lid?
Use low heat, and start checking at 3 minutes. As soon as the whites set and yolks thicken slightly, remove the pan from heat and let it finish off-lid for 1 minute.
3. What’s the best skillet for this kind of recipe?
I prefer cast iron for heat retention and crust development. Nonstick also works if you’re avoiding extra fat. Avoid thin aluminum—it overheats and cooks unevenly.
4. Can I make this recipe dairy-free?
Absolutely. Use olive oil instead of butter, skip cheese, and consider adding herbs or miso paste to build richness without dairy.
5. Do I need to flip the eggs?
No. The covered skillet method steams the tops gently. Only flip if you want over-easy or fully set yolks—and do it carefully to avoid breaking them.
6. Can I reheat this dish later?
Yes, though eggs may firm up. Reheat in a skillet on low with a lid or microwave with a damp paper towel to retain moisture.
7. What vegetables go best in this skillet?
Potatoes, mushrooms, peppers, and greens like spinach or kale work well. Just pre-cook high-moisture items so they don’t water down the dish.
8. Is this recipe good for meal prep?
It can be. I make the chicken and onion base in advance and cook eggs fresh. That way, flavor stays intact and texture doesn’t suffer.
9. How long does the dish take from start to finish?
With raw chicken, around 25–30 minutes. Using pre-cooked meat cuts it to 15. Most of the time is spent waiting—not active cooking.
10. Can I cook this on a campfire or grill?
Yes, and it’s excellent outdoors. Use a cast iron pan, moderate heat, and a real lid or foil. Avoid open flames—cook over embers or indirect heat.
11. What spices go well with this dish?
Paprika, cumin, garlic powder, and black pepper are staples. Add fresh thyme or rosemary for a more herb-forward profile.
12. How do I know when the chicken is cooked through?
The internal temp should hit 165°F. But you’ll know it’s ready when the pieces are firm, the juices run clear, and the outside is golden.
13. Can I substitute eggs with tofu or plant-based alternatives?
Yes. Firm tofu can be sliced and seared in place of eggs. You can also use vegan egg replacers that set under steam if you’re keeping it egg-free.
14. Can I make a spicy version?
Definitely. Add jalapeños to the onions, use spicy paprika or chipotle powder, and finish with chili flakes or hot sauce on top.
15. How do I serve this for a crowd?
Use a large electric griddle or two pans. Cook the chicken and onions in advance, then add eggs in batches. Keep warm in a low oven until ready to serve.


Post Comment